Good Morning Peeps! It’s SATurday and I’m up at the crack of dawn because I’m can never sleep in and I’m so mischievous because guess what???!!! There’s one more day! This is like the surprise party you’ve always been waiting for. So enjoy this encore to the ’12 Days’ because you’re in for a treat—— it’s a twofer! First we have my real life friend and latin teacher to my girls, Susan. She’s so full of talent, that girl. She makes all kinds of jewelry and lots of other fun stuff. I’m always tempted to cancel latin and just craft with her instead. And sometimes I do. I’m so happy to introduce you to her, her blog and her etsy shop. And then there’s my sweet blog friend Molly, who has been so encouraging to me over the past two years. She’s a faithful friend/reader/blogger and has some silhouette pins to share with us.

If you’re new to the ’12 Days’, you may visit the previous days by clicking on the day you of your choice:
Day 10 Cinnamon Honey Butter and Toffee Popcorn


Let dry overnight.
To assemble:


Silhouette Pins
 Ok you will need to gather up your supplies.
  Here is a picture of the silhouette templates from the graphics fairy. They are really cute! I used the one with the hat for the little girls and the other two for my mom and sister.

Step one: Pin your silhouette template to your black felt and cut around the edges.
Step two: Embellish your silhouette with lace, beads, whatever you fancy!
Step three: Cut out a large circle or oval in a contrasting color using felt. This will be part of the backing so you want the silhouette to fit nicely inside.
Step four: Now sew your pin back on the circle or oval you just cut out.
Step five: After you have finished sewing your pin back on, cut out another piece of fabric in a smaller size circle or oval. I like to use either metallic fabric or polka dots for contrast.
Step six: Place the smaller circle or oval you just cut out over top of the first circle or oval you cut out. Now sew a straight stitch around the edges in a contrasting color. I like to use embroidery floss because it is chunky.
Step seven: Now sew the edges of the silhouette onto your base. Use black thread or embroidery floss.

Your silhouette should look like this after you are finished.
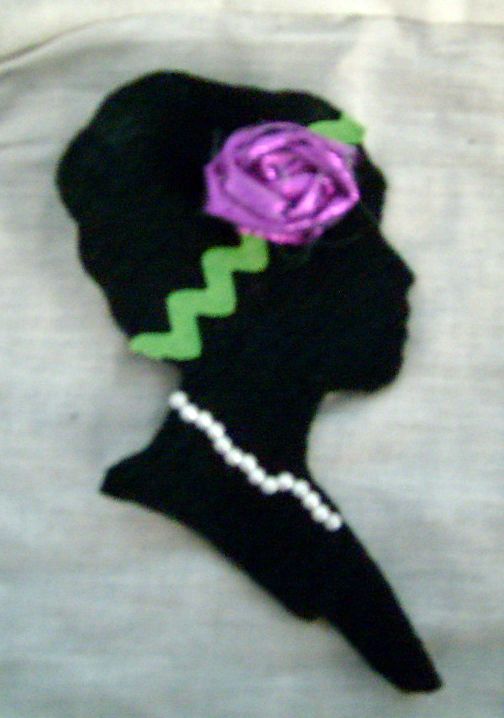 Here is another silhouette just without the backing. I hide the thread from sewing the pin back on with ric rac and then add a little rosette or sparkly to her hair.
~ Gal Molly