This is the LAST DAY of a 12 days series of {handmade} Christmas tutorials. Can I get a woot-woot? Make sure to check out the all the projects for 2012, 2010, and 2009!
And I’m hosting myself. Which is why I’m late. Fancy that.
********************
You know those greeting cards that play music when you open them? Well, I want to expand on that theme except that I want music to start playing when you open my front door.
What music, you ask?
“Hello, Darlin’ ” by Conway Twitty, of course.
How awesome would that be? You walk into my front door and all sounds stop except for Conway Twitty blasting out,
“Hello darlin’, nice to see you, it’s been a loooooong tiiiiiime. You’re just as lovely as you used to be.”
Can anybody come wire my house to do that? Pretty please?
Until then, I’ll just have to make do with my Hello Darlin’ pillow.
So, next time you come to visit, I hope you feel the warm welcome that only ‘Hello, darlin’ can bring.
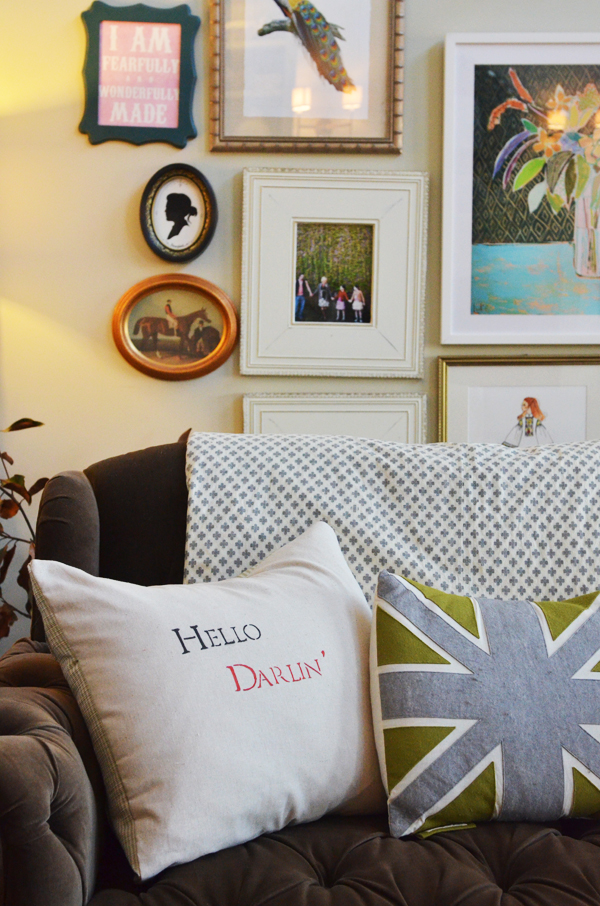 This tutorial is an attempt at combining this tutorial for stenciling pillows and this very easy tutorial for making an envelope pillow!
Here’s what you’ll need:
stencil of your choice—mine are 1 1/2 inch stencils by Martha Stewart’s from Micheal’s (buy your favorite font, size)
fabric markers—i bought Sharpie’s brand from Amazon.
a pillow cover (blank linen) or just a piece of linen or canvas or cotton fabric cut to the size you want (directions for mine to follow)
a self-healing mat
a rotary cutter
a pencil
a ruler ( I have a lip-edged ruler which has transformed my sewing projects. I LOVE IT!)
Here are a few basic instructions:
Decide on your quote. Which is easy. Hello darlin’ cannot be improved upon, can it? We also made one (or at least Elea did) that says, “You are my sunshine.”
Decide on your spacing. I made a 20×20 pillow cover for this one and once we cut our material, we just laid out the letters and decided how we wanted the spacing. We used a ruler to generally keep the letters straight but I’m not a perfectionist so I don’t waste too much precious time ciphering about it.
As a matter of fact, my 10 and 12 year old did all the work—–the tracing with pencil………
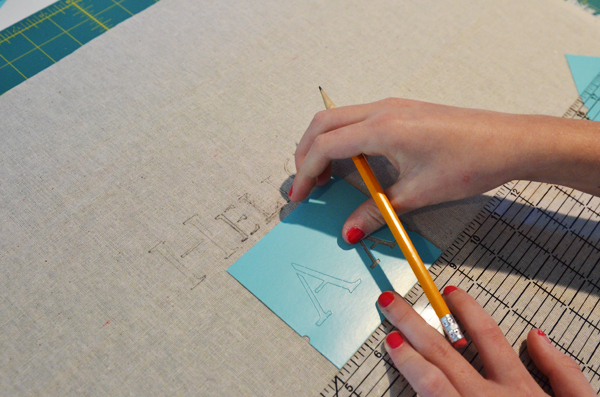
and filling in with the fabric markers.
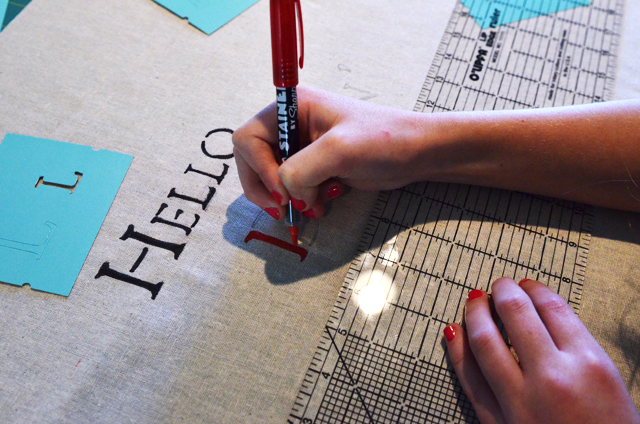
Then you’re ready to make the pillow cover. This is the easiest pillow cover in all of creation. I’ve been making these for years but I found Jenny’s tutorial so easy to understand so I’ll adopt her method of doing it from now on.
You’re basically going to cut a long strip of fabric which you fold over the pillow like an envelope and then sew on the top and bottom.
For a 18 inch square pillow (which I used to demonstrate the technique), I like to make my pillow cover a inch or so smaller so it will fit tight. This works especially well with down inserts, which are much more smush-able when you’re squeezing them into tight spots.
So, for this pillow I cut a piece of fabric 18×42 piece of fabric.
Lay the fabric out so that the longest part is horizontal. Fold over both ends about a half inch (on the 20 inch ends) , iron them and then sew the edges down. This makes the ends look more finished. I don’t know why I did a zig zag stitch here. I usually don’t. Just do a straight stitch.
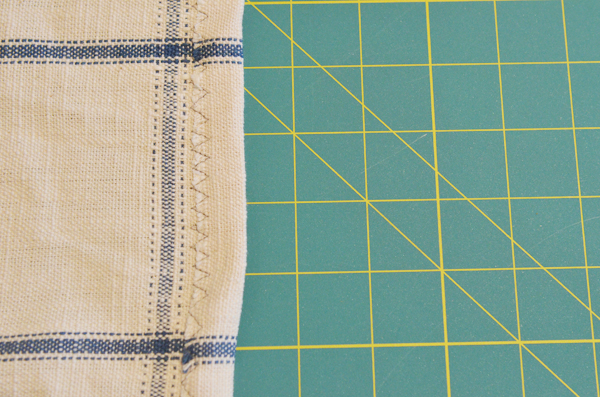
After doing that to both ends, fold the ends in with your fabric right side in, like an envelope.
Once you fold both ends over onto each other, use your ruler to decide how wide you want the pillow to be. I want mine to be 17 inches wide because my pillow insert is an 18 inch square and I want to have to squeeze the pillow in and then fluff it around, giving it a taut appearance. If your insert is 20 inches and you want it to fit not-so-taut, then make it 20 inches at this step. So my ends are folded over, overlapping a few inches with my total width being 17 inches. Now, all I have to do is sew up the top and bottom of the fabric and we’re done. You can turn the pillow cover to the right side through the opening where the fabrics overlap.
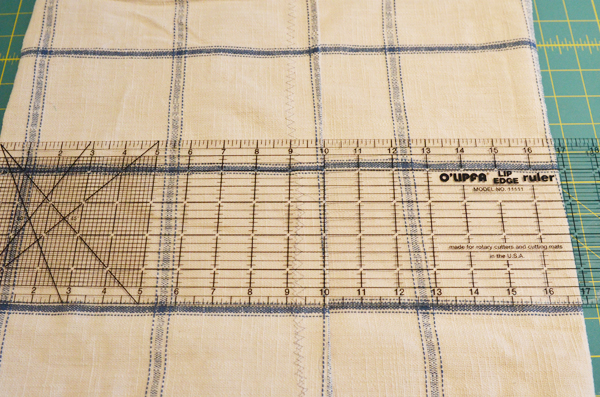
When you sew up the ends, using a 1/2 inch seam allowance, and then turn it to the right side, it looks like this.
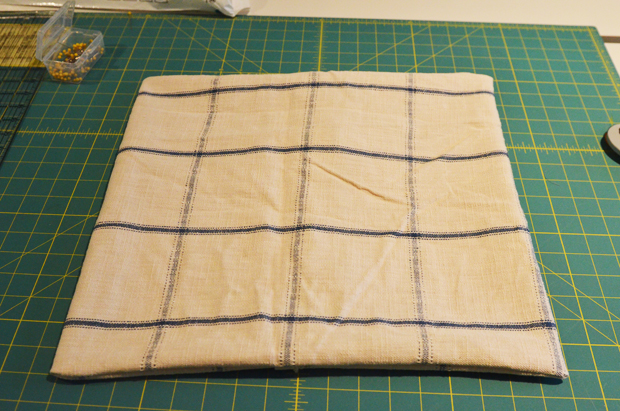
Once you get the hang of these, you can make them in less than 15 minutes.
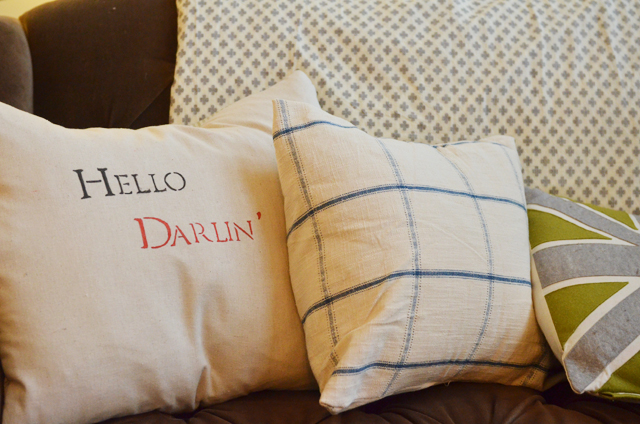
Here’s how it looks by the Hello Darlin’ pillow.
See how the sides of the pillow aren’t sewn? That’s where you folded the fabric over. The top and bottom are sewn, which makes it the simplest pillow cover to make the entire world!
And in case you need a Conway Twitty tutorial……..

if i was a crafty girl i’d whip that right up because dantheman can NOT get the darlin’ down. while i am aware that any boy born on long island probably will never master darlin’ with a preferred southern drawl but the dude says “darleen” . i swear it sounds like darlinG…i told him would you please quit pronouncing the G. the G is silent. it’s not hello darlinG. for the love.
but he says he’s not pronouncing the G. however the emphasis is on the “leen”…not the “dar”.
gosh, can’t teach those yankees anything about proper pronunciation…
love it sister
xo
Bless your heart!! Love this. I have not had time to peruse the other projects yet but will do so tomorrow. We are in need of gifts and decor and all kinds of seasonal loveliness! For now I am off to make chili. xoxo
These are great. I love how easy they are. I am tired of our current pillows and need some new ones. Yours are completely fabulous.
Now you will have to let us know if you get your house wired to sing whenever you open the door. That willbe quite an amazing welcome.
Ruth
When I saw the title of this post I had a sneaking suspicion that you were doing this one yourself. Love it! Yes, there needs to be music wired to the doorbell.
Did I tell you of the time my cousin was playing records at her house and put one on that was taking a long time to start? She jumped up, lifted the lid of the stereo ready to lift the arm and try again, when Conway belted out, “Hello, Darlin'” at that exact moment. It was LOUD. Scared her silly. We laughed until we couldn’t breathe. We still get a good chuckle out of that one.
Oh my gosh, I’ll be singing this the rest of the day! I grew up (in East Tennessee, by the way) listening to Conway Twitty. Love the pillow! I’ve followed your blog for a while, but I’ve never commented. Your posts sometimes make me homesick, but in the best kind of way. Thank you, Edie!
I like this lots. Just saw a saying I want to put somewhere…maybe a pillow! “the mountains are CALLING and I must go”
Thanks Edie
I am impressed! : )
I love the pillow and the Conway Twitty song. My son said before he got married that he was going to have his house wired to play Patsy Cline’s “Crazy”, Then everytime his new wife got aggravated at him and said “you’re crazy”, he would have a remote to hit and the song would start playing. I like your application and his!!
Thank you darlin’…… 🙂 I want that door welcoming music thing ‘a ma jig…..you are going to have to patent that! Love the pillows too! Especially the stenciled one. 🙂
and the Conway tutorial was priceless! have not thought of that song and my country roots in so long…
thank you, Edie 🙂
why, hello to you too!
I love your sofa. Can you tell me where you got it?
i love it….
i soooo wish i was the sewing type.
i guess the fact that i’m not pretty much proves that my husband is indeed correct when he says i wouldn’t last ten minutes in frontier life, like i dream of doing.
CBSNews.com has spoken to two leading experts in chemical and biological weapons and warfare, and the clear consensus is that no chemical weapons have been used inside Syria.
pharmacie en ligne sans ordonnance https://kamagrameilleurprix.com/# Pharmacie Internationale en ligne
pharmacie en ligne fiable cialis sans ordonnance pharmacies en ligne certifiГ©es
Viagra femme ou trouver: acheter du viagra – Viagra homme prix en pharmacie sans ordonnance
https://kamagrameilleurprix.com/# Pharmacie Internationale en ligne
pharmacie en ligne sans ordonnance
trouver un mГ©dicament en pharmacie: Tadalafil sans ordonnance en ligne – Achat mГ©dicament en ligne fiable
pharmacie en ligne fiable cialis generique Pharmacie sans ordonnance
Pharmacie Internationale en ligne: pharmacie en ligne sans ordonnance – pharmacie en ligne france fiable
pharmacie en ligne france fiable https://pharmaciemeilleurprix.shop/# Achat mГ©dicament en ligne fiable
Viagra Pfizer sans ordonnance: viagra sans ordonnance – Viagra homme sans prescription
pharmacie en ligne Pharmacies en ligne certifiees Achat mГ©dicament en ligne fiable
vente de mГ©dicament en ligne: Acheter Cialis – Achat mГ©dicament en ligne fiable
acheter mГ©dicament en ligne sans ordonnance https://pharmaciemeilleurprix.com/# pharmacie en ligne france livraison internationale
pharmacies en ligne certifiГ©es: Tadalafil sans ordonnance en ligne – pharmacie en ligne france pas cher
Pharmacie en ligne livraison Europe https://kamagrameilleurprix.com/# pharmacie en ligne
Achat mГ©dicament en ligne fiable kamagra pas cher pharmacie en ligne france fiable
Pharmacie en ligne livraison Europe https://kamagrameilleurprix.shop/# pharmacie en ligne france pas cher
Pharmacie en ligne livraison Europe https://viagrameilleurprix.com/# Viagra homme prix en pharmacie sans ordonnance
Pharmacie en ligne livraison Europe: kamagra oral jelly – pharmacie en ligne fiable
trouver un mГ©dicament en pharmacie https://tadalafilmeilleurprix.shop/# Pharmacie sans ordonnance
Viagra femme ou trouver viagra sans ordonnance Meilleur Viagra sans ordonnance 24h
pharmacie en ligne france pas cher https://viagrameilleurprix.shop/# Quand une femme prend du Viagra homme
Pharmacie Internationale en ligne pharmacie en ligne sans ordonnance trouver un mГ©dicament en pharmacie
pharmacie en ligne fiable: pharmacie en ligne – п»їpharmacie en ligne france
https://viagrameilleurprix.com/# Viagra femme sans ordonnance 24h
Pharmacie sans ordonnance
pharmacie en ligne france fiable: vente de mГ©dicament en ligne – pharmacie en ligne
pharmacie en ligne france fiable https://kamagrameilleurprix.shop/# pharmacie en ligne
Achat mГ©dicament en ligne fiable: pharmacie en ligne pas cher – Pharmacie sans ordonnance
trouver un mГ©dicament en pharmacie https://viagrameilleurprix.com/# Viagra homme sans prescription
pharmacie en ligne avec ordonnance kamagra en ligne Pharmacie Internationale en ligne
Plinko game for real money Plinko online Plinko game for real money
http://plinkodeutsch.com/# plinko germany
http://plinkofr.com/# plinko ball
plinko game: plinko geld verdienen – plinko wahrscheinlichkeit
https://pinco.legal/# pinco casino
pinco.legal pinco legal pinco
https://plinkofr.shop/# plinko game
avis plinko: plinko fr – PlinkoFr
pinco.legal: pinco casino – pinco
https://plinkocasinonl.com/# plinko nl
http://plinkocasi.com/# Plinko casino game
plinko france: plinko casino – plinko game
Plinko app Plinko app Plinko online
plinko nederland: plinko spelen – plinko casino
plinko casino: plinko wahrscheinlichkeit – plinko germany
plinko: plinko – avis plinko
plinko nederland plinko nl plinko spelen
pinco slot: pinco casino – pinco.legal
https://plinkocasinonl.com/# plinko nl
http://plinkofr.com/# plinko ball
Plinko Plinko casino game Plinko
https://plinkofr.com/# plinko ball
https://plinkodeutsch.com/# Plinko Deutsch
http://plinkofr.com/# plinko fr
Plinko games: Plinko online game – Plinko online
https://pinco.legal/# pinco.legal
https://pinco.legal/# pinco legal
pinco casino: pinco – pinco casino
Plinko game for real money Plinko game Plinko
https://pinco.legal/# pinco slot
Plinko-game: Plinko – Plinko online game
http://plinkofr.com/# plinko casino
pinco: pinco – pinco slot
https://plinkocasi.com/# Plinko games
Cert Pharm Best Mexican pharmacy online mexican pharmacy
mexican online pharmacies prescription drugs https://certpharm.com/# mexican pharmacy
Legit online Mexican pharmacy: Cert Pharm – Legit online Mexican pharmacy
purple pharmacy mexico price list https://certpharm.com/# mexican pharmacy
Cert Pharm Legit online Mexican pharmacy Best Mexican pharmacy online
mexican pharmacy online: mexican pharmacy – Cert Pharm
mexico drug stores pharmacies https://certpharm.shop/# mexican pharmacy
mexican pharmacy Best Mexican pharmacy online Legit online Mexican pharmacy