
If you’re new to the ’12 Days’, you may visit the previous days by clicking on the day you like:
Today’s guest poster needs no introduction to my readers. It’s a well known fact that I love Meg. She never ceases to inspire me. I love her bold use of color everywhere and her very funny sense of humor and her love for the creative life. I consider it a privilege to look at the world through her lens and am giddy to have her here with us today. You’re gonna want to bookmark her blog and her etsy shop, which will be open January-April. Welcome Meg!
i am so happy that Edie asked me to be a part of her 12 Days!

my name is meg duerksen.
(it’s pronounced dirk-sin…in case you’ve always wondered)
i blog over at whatever.
i do not use capital letters because it’s easier not to.
i am a mom to five goofy kids.
i am a photographer.
i love to do crafts with my kids.
i love to sew.
i love mr. duerksen.
i love movies.
but that’s enough about silly me and all the things i love….lets get crafty.
i am going to show you how i recycle old crayons into really cute alphabet crayons.
normally i would use a big box of old crayons….you know the kind…half used…kind of a mess.
the kind that kids don’t want to use anymore.
but today i used new crayons because i have used up all my old crayons.
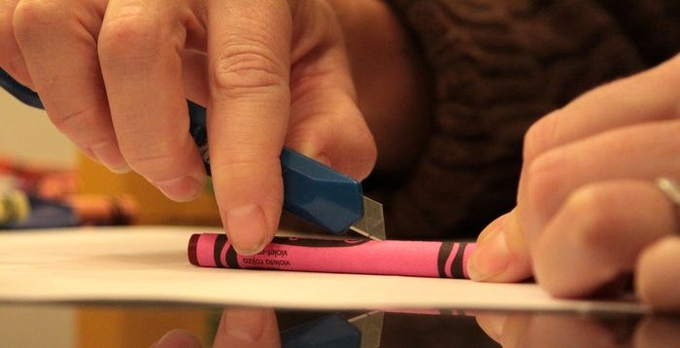
i cut the paper off with an exacto knife. just a quick cut down the side is enough and the paper comes right off.
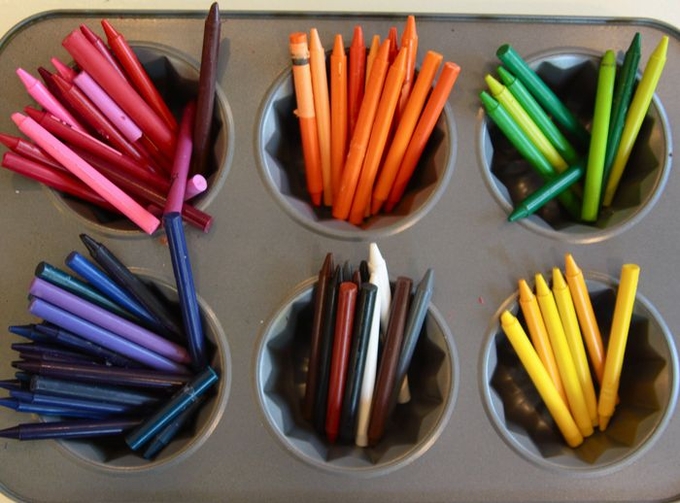
it’s helpful for me to sort them by color.
and happy too.
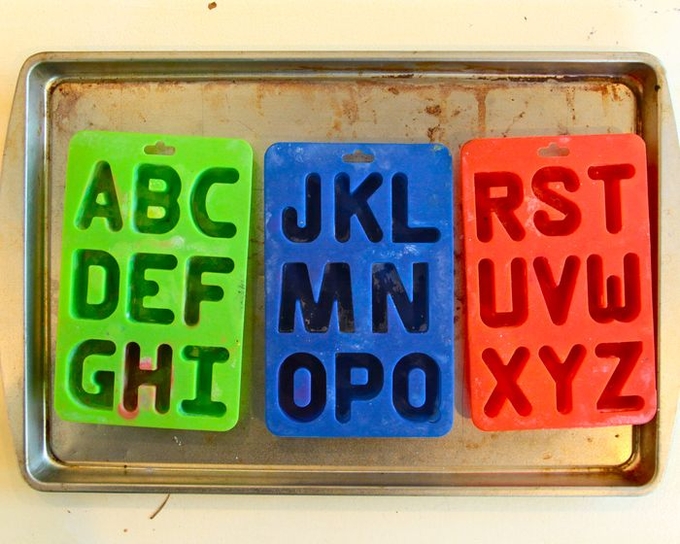
i use these silicone alphabet silicone ice trays from spoon sisters.
place them on an old cookie sheet because you may spill and you’d hate to ruin a good pan.
fill each letter with broken bits of crayons.
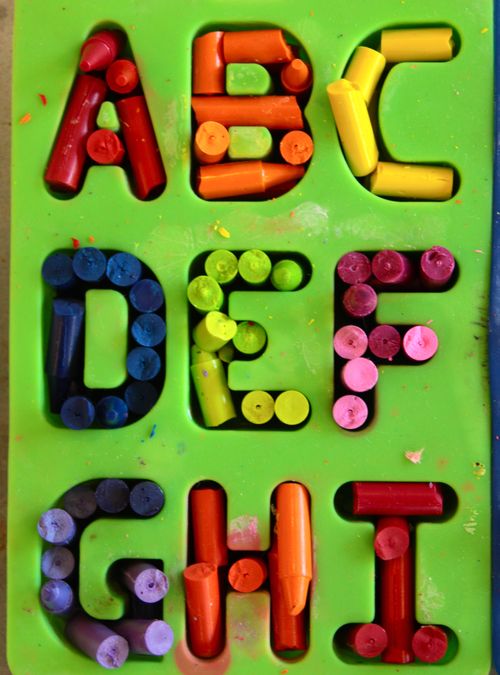
it is ok if some stick out a little but you don’t want to over fill
too much because the wax will melt over into the other letters.
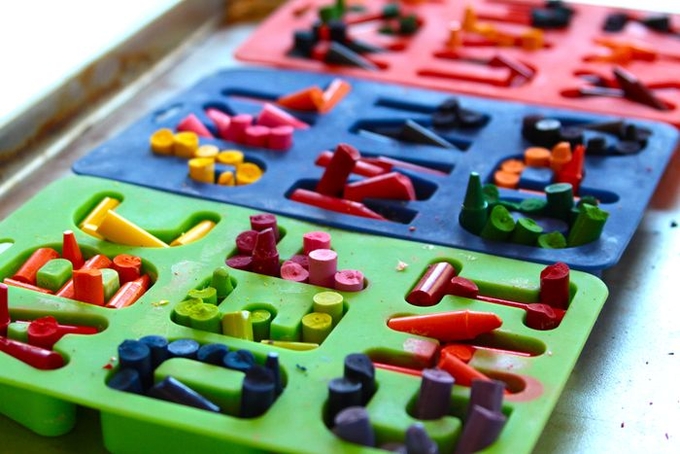
i placed them into my oven at 250 degrees for 20 minutes.
when they are fully melted into liquid they are finished.
take them out of the oven leaving the trays on the cookie sheet and let them cool for several hours.
once they are completely solid you can gently push them out of the molds.
the S and the U of my set broke when taking them out.
next time i will just try to be more careful.
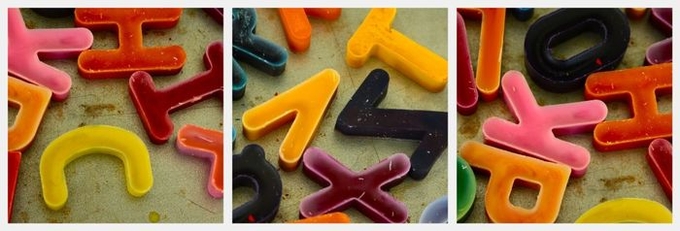
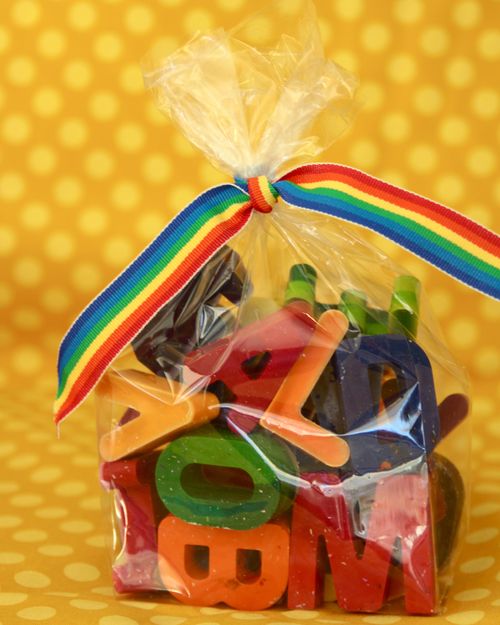
i put them all together in a clear treat bag and tie it with a ribbon.
it makes a really cute a colorful gift!
thanks Edie!
i love your 12 Days of Handmade.

So glad you are doing this again, I’ve only just realised. Thanks to Melissa at A Familiar Path for the reminder! I’m a bit behind in my reading after being in the US for 3 weeks.
These are so cute and such an easy project, you could do any shape with these, I’m thinking Christmas shapes – green trees etc would work too.
I am loving your twelve days of handmade and especially lovely to find one of my favorite bloggers over here!!! Brilliant!!!
I am a kindergarten teacher, so we go through crayons like crazy!!! It kills me to throw them away just because the kids think they can’t use them anymore. Now, I have a solution!
Oh my…these are CUTE!!!
Elise
Oh%20my…these%20are%20CUTE!!!
Elise
I’m obsessed!!! What a darling idea. Thanks for sharing.
I love this craft! I can’t wait to do this with my little boy!
Love it! I’m absolutely doing this for Christmas gifts!
probably my favorite so far.
promise it has nothing to do with my bloggy crush on meg.
I’ve made these they where such a hit.
love this idea! just wondering if you need to use a silicone mold or can you use a regular metal/tin one?
Where did you get the alphabet molds? Such a precious idea, and I’m loving this handmade Christmas list!
LOVE this idea Meg. I might actually do this one someday:)
That’s such a great idea. I really need to try this.
yay!! so happy to see meg! this tutorial is so great! i made these a few years ago for my son’s valentine’s day party (using her tute) by using heart molds from the dollar store and everybody loved them!! i had kinda forgotten that, now that i remember i need to make some for Christmas this year. or maybe thanksgiving?????
Adorable! We also did this last Valentines day with heart molds for class gifts, but I *love* the alphabet idea. Thanks, Meg…inspiring as always! 🙂
This is sooo cute!!! I love the way all the colors look in the bag….any kid would be so happy to get this!!
This%20is%20sooo%20cute!!!%20I%20love%20the%20way%20all%20the%20colors%20look%20in%20the%20bag….any%20kid%20would%20be%20so%20happy%20to%20get%20this!!
wow…I dunno what happened to my message before…lols…but I thought this was a super cute idea to use letter molds..love!!!
This deserves some capital letters…THIS IS GENIUS! Thank you, thank you, thank you!
A + dorable!
I did these for Calvin’s b-day party at pre-school. I did bags with the names of each kid in his class. I had TROUBLE with a few of the letters. Some surgical welding was required to smooth things over, in some cases. But it was FUN! And so pretty and happy.
Loving the 12 Days! My sewing machine isn’t going to know what hit it. This is another great idea and will give the machine a rest! Thanks, Edie & Meg!
I just found your site via “whatever”! Love, love, love it!! We too are a homeschool family so I always love finding homeschool family blogs :). Love the Vols shirt in the pic! My husband is from Talbott TN so we are big fans!!
Ohh! I love this idea! What a fun gift to give. Since I haven’t pulled out my sewing machine in months, I am thrilled about this craft (no sew).
My kids will love making the craft with me!
WOW. I LOVE LOVE this idea – I am Defiantly using it!! 🙂
WOW. I LOVE LOVE this idea – I am Defiantly using it! 🙂
I heart these! I’m going to buy some extra crayons and make these with my kids.
What fun!
-FringeGirl
Cute idea, Meg. Lovin’ this series, Edie!
Love it! So cute and so easy!
Wow that looks so easy! And SOO cute!
this is such a fun idea! i’m enjoying the series as well. thank you!
This is a great idea. Will be using this for gifts this season!!
Found this set for $12.50…
http://www.ochelly.com/item.php?item_id=150
AWESOME! I just used this technique to make crayons for my boys Christmas stockings (but with silicone skull shaped molds I got from dollar tree during Halloween season!) They are going to be SO excited!!!
sounds awesome jenn!
Thanks for your great tute! and thanks to Randa, previous commentor, for the heads up on the deal at ochelly. I think I got the last one that they had! 🙂
What a cute idea!
I totally stubbled upon your blog- and though full of great stuff- Your picture made me smile. You are beautiful! LOVE your smile! Have a blessed day!!
What a great idea! I’ve got four grandchildren who will LOVE these…thank you.
Fantastic idea! Thanks for giving all these tutorials. This will make holiday shopping a snap!
I love this! Gonna try it… 🙂 But just wondering, will I be able to use my silicone tray for coocking after this? Im mean… are there toxins and stuff in the crayons that would remain in the silicone tray?
i think if they’re safe enough for kids to eat – which they definitely do – then you’re probably fine. 😛
Love it!
I stubbled upon this thanks to pinterest and had the idea of giving these as Christmas gifts, but giving them with just the letters of the kids names. Letting them have crayons that spell their name!
canada pharmacy world
https://expresscanadapharm.com/# Express Canada Pharm
precription drugs from canada
502813 148673You got a really great site, Sword lily I observed it by means of yahoo. 21958
298061 53954Nice post. I be taught 1 thing much more challenging on entirely different blogs everyday. It will all of the time be stimulating to learn content material from other writers and apply slightly 1 thing from their store. Id desire to use some with the content on my blog whether you dont mind. Natually Ill give you a hyperlink on your net blog. Thanks for sharing. 445220